In this post, I'm trying to show you how to design t-shirt adopted by fresh news nowaday. It's all about "Tabung Gas 3 Kilogram" or 3kg Gas tube which cause many problems in our community. Here in belajar design t-shirt, this design just to warn another to be care with this. Okay, let's keep on to the point of this post.
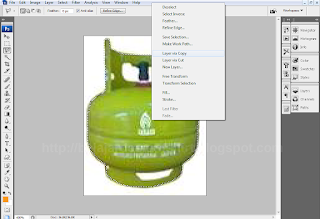
First of all, find an image of 3kg gas tube in search engine or anywhere. Recomended with high resolution one. If you've found, make a selection on image with selection tool on your Photoshop program. If done, righ click on your selection and click Layer Via Copy or Cut.
Now you've got your gas tube selection. Click Layer > Layer Style > Color overlay. Choose black color with normal blend mode. Naw, your gas tube become black.
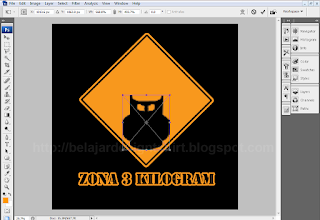
Open our default canvas with black solid color. Activate Rounded Rectangle Tool (U), set radius 15px and #FF9900 base color. Press Shift while you make a rounded rectangle on canvas. Press Ctrl+T to switch position shown on image below.
Give stroke on the rounded rectangle shape layer. Click Layer > Layer Style > Stroke.
Set stroke; Size 18px, Color #FF9900, Opacity 100% and Normal blend mode.
Added Inner Glow Layer Style with these setting. Blend mode: Normal, Color: #000000, Size: 18px, and Range: 1%. See screenshot below!
Type some texts ZONA 3 KILOGRAM using font Stencil. Give stroke and Inner Glow on text with the same way as above. You can set your own style here.
If you'e on the right track, this what we've got. Right, good job!
Wish you still remember with our black gas tube. Drag it onto rounded rectangle. Don't be shock. It's small like you see caused different resolution with rounded rectangle. We have to make it bigger..!
Select layer 1, Click Layer > Smart Objects > Convert to Smart Object. This action needed to keep its base color when re-size or remove.
Press Ctrl+T to transform the layer. Adjust its position and size as like as you want.
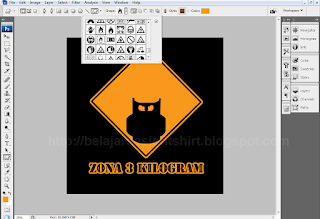
If you've got the size or position you need, activate your Custom Shape Tool (U). Choose Tymoes Shape. You can download the shape for your stuff.
Set the Tymoes position above gas tube layer. Make your own style.
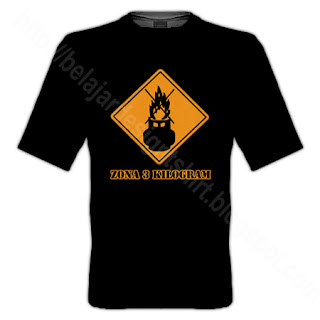
Finish...we've finalized our design. You can save this on JPEG for further print.
This what we can see on your custom t-shirt.
Thanks for all your supports on belajar design t-shirt, a place where you can start to learn design t-shirt with photoshop. Don't forget to download PSD and JPEG file of this post. See you next post!


0 komentar:
Posting Komentar