
Nice day to all of you who are still keep on track on my newest post in this belajar design t-shirt. How glad I am able to post again. And in this moment, I'll try to serve you with a new style named, "I Know what you did on facebook", a nowadays Indonesian movie title. Wish you enjoy it.
In this learn design t-shirt, we use a canvas with white solid color as background. Do the same way to set canvas like my post before.
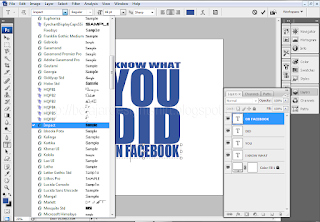
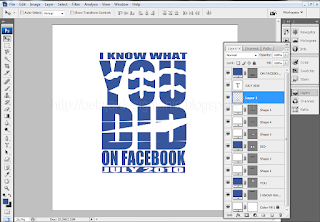
Type texts I KNOW WHAT, YOU, DID, ON FACEBOOK. By these actions, you'll have four text layer. Choose Impact font style and personalize text size. Re-arrange size with transform mode. Select a text to transform and Press Ctrl+T to find your customization size and place. See the screenshoot.
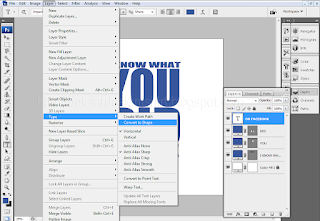
After all text layer become shape layer, now we're gonna customize "YOU" shape layer. Click on vector mask thumbnail, the square area shown with dark grey on YOU shape layer.

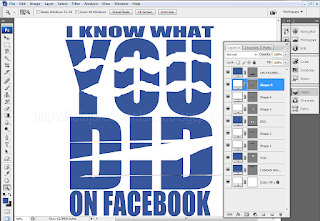
Activate your Pen Tool (P) and choose Freeform Pen Tool. Personalize text YOU with your own style. Use your sense of art..hehe

Now you see, this what I've got with my action. How about you? wish it better than mine. Keep on eyes, there are two layer added above YOU shape layer. Change those layer color into white.

Do the same action with DID shape layer. This what I've got. You? I'm sure, you're better than me. Keep on!
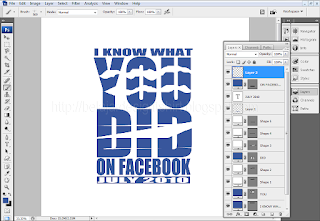
Type a new text, JULY 2010 and put it down under ON FACEBOOK layer. You can type your own text.
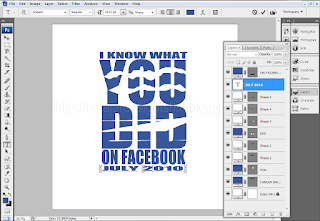
Create a new layer [layer 1]. Make sure, you put the new layer under text JULY 2010.

Fill the new layer with the same color of your shape text layer [dark blue]

Put text JULY 2010 on Layer 1. Change the color of JULY 2010 text layer into white and put it on Layer 1.

Customize its size and place with transform mode [Ctrl+T]. This is the final result.
Keep on to next step. Create a new layer. Automatically shown as layer 2 placed above all layer.
We're gonna make a blood effect. Click Layer > Layer Style > Color Overlay.
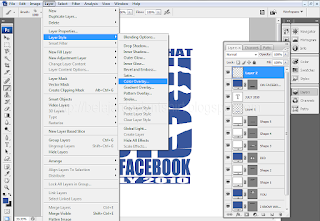
Personalize color overlay with bloody color. Here I used #ad012e with normal blend mode and 100% opacity.

Activate your Brush Tool (B) and choose Brush Splatter 6 with 1000px Master Diameter.

Click on text shape to make a bleeding effect. Personalize your own.

Use your Eraser Tool (E) to wipe out unwanted bleeding style effect.
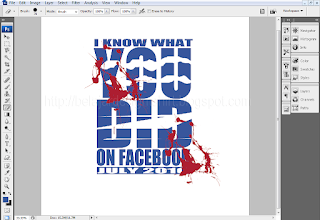
This what can you see on your own t-shirt.

Keep on learning here with belajar design t-shirt. Don't forget to download JPEG and PSD file of this post. Thanks and see you...
6 komentar:
I Like it!
it cools..
i hv added your link to my list..thanks for visiting me and keep in touch please...^_^
Cool design bro...,
Your blog is my inspiration...thanks..
hello i like the slogan
I KNOW WHAT YOU DID ON FACEBOOK HAHA!!!
indonesia's bahasa same with malaysia's?
terima kasih kerana melaman blog saya HAHA
thanks for leaving comment for the one-eyed girl that i drew
aligato!!!
met siang..ada award dariku bwtmu..kalo berkenan, tlng diambil awardnya ya...^_^
that's great...
Posting Komentar